Hibernate is a power saving state primarily designed for windows pc or laptops in which it saves the current status and shuts down itself. When you start up the PC again, you get back where you left and all the previously running apps are restored to the state before hibernation. Though Hibernation is not as fast as sleep mode, it consumes less power than sleep. This mode is well suited in case you don't use the laptop or PC for an extended period of time.
Windows 10 doesn’t include Hibernate option by default under Power Menu but you can easily enable it. Here are the steps to enable Hibernation and show it up under Power Button Menu in Windows 10.
Enable Hibernate Option in Windows 10
- Right click on Start Menu and select Power Options. Alternatively type “power options” in the search box and press Enter.
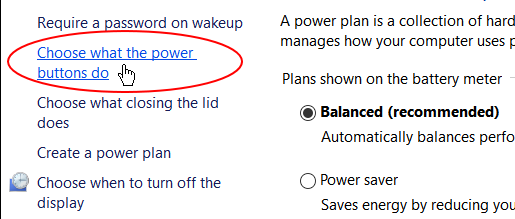
- The Power Options section will be shown within the Control Panel. Now go to the left side column and select “Choose what the power buttons do”.

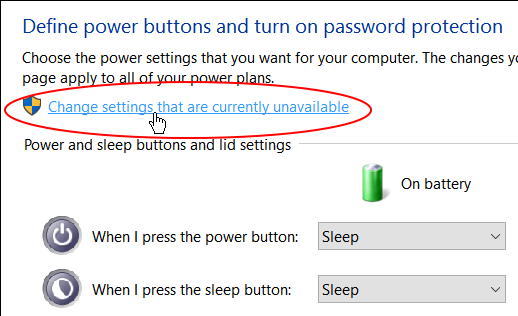
- Next click on “Change settings that are currently unavailable” link.

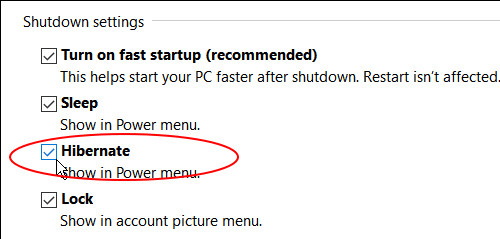
- Scroll down to the “Shutdown Settings”, check on the “Hibernate” option and save the settings.

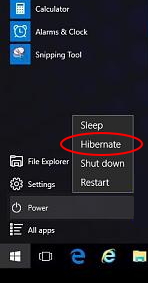
- Now Hibernate option will be enabled in Windows 10. To check it out, open Start menu and click on the Power button. You will find Hibernate option under the power menu.

Hibernate Windows PC/Laptop from Command Line
In order to Hibernate the computer system through command line, open command prompt and type shutdown /h and press Enter. This will Hibernate your computer and save the status of the running applications.
If you want to force close all the running apps and hibernate, then use shutdown /h /f command.

No comments