Showing posts with label Kindle Fire. Show all posts

How to Enable/Disable Auto Rotate on Kindle Fire

Posted by on 8/29/2016

This post will explain how to enable/disable auto rotate on kindle fire tablet.

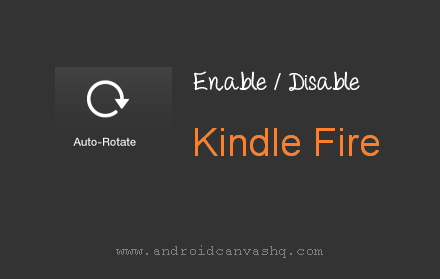
Are you annoyed of kindle fire rotating the screen every time you turn the device a little? This happens just because auto rotation is enabled by default in kindle fire. But fortunately you can disable the feature and lock the screen from switching orientation automatically. And here's how you can enable or disable auto rotate on kindle fire tablet.
enable-disable-auto-rotate-on-kindle-fire

Enable/Disable Auto Rotate on Kindle Fire:

  • From Kindle Fire/HD/HDX Home screen slide down the top notification bar to open quick settings and tap on 'Auto-Rotate' menu to toggle the setting. Say if the option is enabled, taping once will disable it and tapping again will turn on the setting.
  • If you use older models then it reads 'Locked/Unlocked' instead of 'Auto-Rotate' - the device reads 'Locked' when auto rotation is disabled and 'Unlocked' if it is enabled.

Following the suggested method, you can enable or disable auto rotation on kindle fire at any time you want.

Upload Photos to Amazon Cloud from Kindle Fire/Mac/PC

Posted by on 8/27/2016

This tutorial will show you how to upload photos to Amazon cloud from kindle fire, MAC or Windows PC/Laptop. Cloud Storages allow you to store & sync documents & photos and access them anywhere from any device.

Purchasing a kindle fire tablet will secure you a 5 GB of Amazon Cloud Drive Storage for free. You can not only upload/download all your photos & files from your fire tablet/phone to Amazon cloud drive but from other devices like Windows/Mac PC/Laptops too. Here we'll see how to upload photos from fire tablet and from MAC/PC.

upload-photos-to-amazon-cloud-from-kindle-fire-mac-pc

Upload Photos from Kindle Fire to Amazon Cloud:

  • To upload pictures to Amazon Cloud from Kindle Fire, choose 'Photos' from top-menu to open picture gallery.
  • Once there, tap on the 'checkbox-with-tick-mark' icon on top and pick the images one by one which you want to upload to Amazon Cloud Drive. This leaves all the selected images overlaid with tick-mark.
  • Once you've finished selecting photos, tap on the 'Cloud' button ('Cloud-Upload') located at the top. This will upload the selected images to Cloud Drive and once it's over, you can access Amazon Cloud Drive to check if your images are present there or not.
  • If you don't know what photos you have moved to cloud don't worry. Whenever you enter into selection mode by tapping on 'checkbox-with-tick-mark' button, images that are already uploaded will be overlaid with cloud icon and the rest would seem normal.

Upload Photos from PC (MAC/Windows) to Amazon Cloud:

  • To upload photos from PC/Mac, visit amazon.com/clouddrive/ and login to Amazon cloud drive. All your uploaded pictures are kept in various folders under 'Pictures' menu. And the folders are named after the devices from which you have uploaded the photos.
  • To download photos from Amazon cloud drive to PC/Laptop, click open any image thumbnail and click again on the 'Cloud-Download' icon found at the bottom of the image.
  • To upload photos/documents click 'Add Files' button at the top-right corner and select files from your pc to upload. Use Ctrl + Left-Click to select multiple files at once on Windows OS.

Likewise you can upload photos from Kindle Fire tablet, PC or Laptop to Amazon Cloud Drive easily.

How to Check for Software Updates on Kindle Fire

Posted by on 8/25/2016

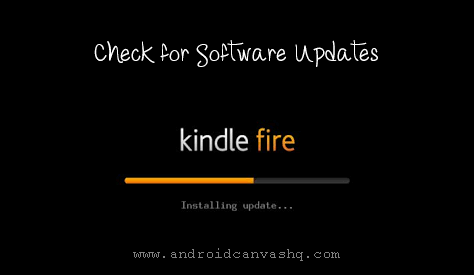
Here comes another kindle fire tips that shows you how to check for software updates on kindle fire tablet. Devices like Kindle Fire, Fire HD & Fire Phone runs on Amazon's Fire OS which is a heavily customized version of Android OS.

To cope up with the industry standards Amazon constantly releases upgrades to its Fire OS and all kindle devices are set to receive updates automatically. But at any time you can check for this software updates manually & upgrade OS on kindle fire and here's how to do it in case you don't know.

How to Check for Software Updates on Kindle Fire?

kindle-fire-change-amazon-account-email-address
  1. To get started, open quick settings window on fire tablet by swiping down a finger from top on home screen.
  2. Choose 'Settings', tap on 'Device Options' and tap again on 'System Updates' then.
  3. The next screen shows up the Fire OS version running on your kindle fire and the last time it has been updated.
  4. To check for the updates manually tap on 'Check Now' button. If there are no updates you'll see 'No updates found' message else it prompts for software install. Just follow the procedure but make sure to backup your data if the update is major to be on the safer side.

So that was all about checking for software updates manually on kindle fire. All your Kindle Apps will get updated automatically but some may need manual updates and in such case notifications will be shown to inform you about their availability.

How to Change Amazon Email Address on Kindle Fire

Posted by on 8/23/2016

This tutorial will show you how to change amazon account email address on kindle fire tablet. Do you know you can change email address of your Amazon.com account? By editing the email address you won't lose your existing account - it only changes the email-id tied to the Amazon account and the password remains unaltered.

Email address can be changed either from amazon.com site or right from your kindle fire / fire HD tablet. Here is the procedure to change email address on kindle fire.

How to Change Amazon Email Address on Kindle Fire?

kindle-fire-change-amazon-account-email-address
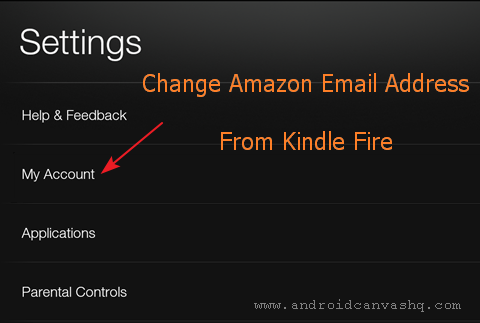
  1. To change Amazon account email address from kindle fire, pull down the notification window and tap on 'Settings'.
  2. On the next screen that comes up, choose 'My Account' » tap on 'Amazon Account Settings' placed right under 'Deregister' button » tap 'Account Settings' then.
  3. Now enter your Amazon account's password and press 'Sign In'. It will take you to 'Account Settings' page showing your profile details like Name, E-mail Address, Password etc. and options to edit them.
  4. Since you need to change amazon email address, tap on the 'Edit' link located across from E-mail address. Provide the new email address you want to attach with Amazon.com account. Again re-enter new email address and password, save changes and you are done!

Likewise you can change amazon email address on kindle fire / fire HD tablet whenever you wish. Just make sure to use the new email for login to Amazon then after.

How to Disable Autocorrect/Autocapitalize on Kindle Fire

Posted by on 8/20/2016

This post will show you how to disable autocorrect & auto-capitalize on kindle fire. Fire tablet/phone comes with enhanced keyboard options like auto-correct & auto-capitalize feature. Despite what Amazon thinks, some of us don't find these settings particularly useful - especially when they get in our way.

You know what the worst part is? They are enabled by default. If you are as tired as me of your kindle device automatically correcting and capitalizing what you type then it's about time you have to disable the settings. Here's how you can do it.

Enable/Disable Autocorrect & Auto Capitalize on Kindle Fire:

  1. To disable autocorrect and autocapitalize on fire tablet, swipe your finger from the top of the screen and choose 'Settings' on the quick settings pane.
  2. Under settings, look for 'Keyboard' options and tap on it.
  3. On the next screen that comes up, navigate to 'Auto-correct' and drag the slider to 'OFF' position to disable kindle fire's auto correct feature. If it's properly disabled the toggle button should be grayed out.
  4. Similarly to disable auto capitalization, look for 'Auto-capitalize' option and set it's slider to 'OFF'.

That should turn off/disable auto correct and auto capitalize on your Kindle fire tablet. At any time you can revert back and turn on auto-correct & auto-capitalize feature by setting the toggle switches to 'ON' position.

How to View Browsing History on Kindle Fire Tablet

Posted by on 8/18/2016

This tutorial will show you how to view browsing history on kindle fire. Silk is the default web browser of kindle fire and just like any other desktop/mobile browsers it stores all your browsing history as you surf Web. Later this history is used to provide auto-complete suggestions when you type anything on browser's address bar.

You can view the entire browsing history all at one place and revisit a web page or bookmark/delete particular entry. If you want to view your browsing history on kindle fire for any of the said purposes here's how to do it.

view-browser-history-on-kindle-fire

View Browsing History on Kindle Fire Tablet:

  1. With Silk open, tap on Menu button (box with tree horizontal lines) located at upper-left corner. It reveals a side pane with settings.
  2. On the side pane, tap on 'History'. This opens a new tab with all your browsing history on silk browser.
  3. It lists your entire browsing history with most recently visited WebPages at the top. You can either scroll down through the list or use 'Search history' box to look through the browser history.
  4. Just like any other web browser you can delete silk's browser history just by tapping on the 'X' button next to individual page entries or by using the trash icon at the top to delete entire browser history.

Likewise you can view all your browsing history on kindle fire tablet. From there you can do whatever you wish.

How to Change Default Search Engine on Kindle Fire Tablet

Posted by on 8/16/2016

This post will show you how to change default search engine on kindle fire tablet/phone. Generally Web browser makers strike deal with search engines to include them as default. Recently Amazon has partnered with Microsoft and made Bing as the default search engine on kindle fire's Silk browser.

Whenever you make searches on kindle fire, the search results will be shown from the default search engine (here it will be from Bing). However you have the liberty to change this default search engine to your liking. Right now Fire supports Google & Yahoo apart from Bing. If you'd like to change default search engine from Bing to Google or Yahoo! here's how.

How to Change Default Search Engine on Kindle Fire?

kindle-fire-change-default-search-engine
  1. To change default search engine on fire tablet, open Silk, swipe from the left edge of the screen, and then tap on 'Settings'.
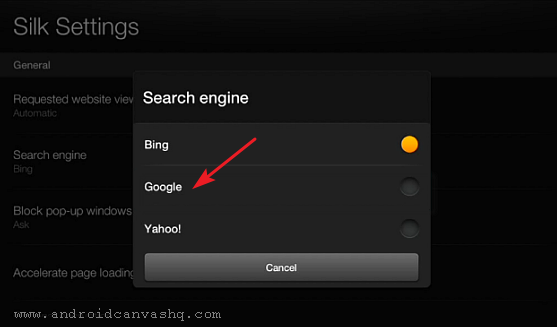
  2. Under 'Silk Settings' look for 'Search Engine' option. Your default search engine will be shown beneath it. It should read 'Bing' unless you have changed it already.
  3. Now tap on 'Search Engine' to open a little pop-up window with three browser options - Bing, Google & Yahoo. Select 'Google' or 'Yahoo' as per your choice and the default search engine will be updated to reflect it.
  4. From now on all your future searches will deliver results from the search engine you have chosen as the new default.

Likewise you can change Silk browser's default search engine on Kindle Fire tablet. Just remember this only affects the searches you launch from the address bar of the silk browser but still you can go to the respective search engines (yahoo.com, google.com, bing.com) and make direct searches from there.

How to Change Font/Text Size on Kindle Fire Tablet

Posted by on 8/12/2016

How to Change Font Size on Kindle Fire Tablet? Are you annoyed of the way you have to squint your eyes every time you read text on fire tablet? Yep! I know - text size is ridiculously small on Fire but it's been deliberately kept that way to show more items on display screen.

Those teeny tiny texts are not gentle on the eyes. The default font size is small on fire tablet but it doesn't mean you can't increase or decrease the text size to suit your need. In case you don't know, here is the way by which you can change the font size on kindle fire tablet.

How to Change Font Size on Kindle Fire Tablet?

change-font-size-text-on-kindle-fire-tablet
  1. To increase text size in kindle fire, swipe down from the top of the fire tablet's screen to open quick settings.
  2. Tap on 'Settings' menu to go to the list of options. Now look for 'Display & Sounds' in the list and tap on it.
  3. This opens a new window in which you have to scroll down to the bottom to find 'Font Size' option. This is the option you have to use to change text size on kindle fire.
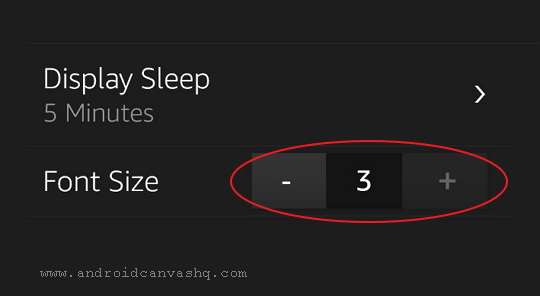
  4. There will be a little button right next to the setting which will show '1' by default (if you haven't changed the font size yet). You can see '+' and '-' buttons on either side of the toggle.
  5. To increase the text size tap on the '+' sign. It can go up to 3 maximum. Obviously you have to tap on '-' sign to decrease the text/font size.
  6. The new font size will be applied immediately making the texts grow bigger. But changing the font size on kindle fire this way will have zero effect on web pages other than making the text on silk browser's address bar and tabs bigger.
  7. Just keep in mind the setting will affect only the texts and not the icons size on your home screen. As the text size increases things will take more room on the tablet's screen and you'll see less on display in one go (minor inconvenience).

Also Read: How to Increase or Decrease Screen Brightness on Kindle Fire

Making the text bigger on Fire tablet will keep away the eye strain. Just use this method and change the font size/text size on kindle fire tablet.

How to Increase/Decrease Brightness on Kindle Fire

Posted by on 8/10/2016

This tutorial will show you how to increase or decrease screen brightness on kindle fire tablet. Display screen eats up most of the battery power on kindle fire. And not to mention the screen brightness is directly related to energy consumption.

In order to read text under daylight, Fire's screen should be brighter and can be kept dimmer on low-light conditions. Enabling auto-brightness on kindle fire will take care of this for you. For those who need to be the one in control, just turn off auto brightness and increase or decrease brightness level manually. Here's how you can do it.

Increase / Decrease Brightness on Kindle Fire Tablet:

increase-decrease-brightness-on-kindle-fire
  1. To turn up or down brightness on kindle fire, swipe down your finger from the top status bar to show up quick settings window.
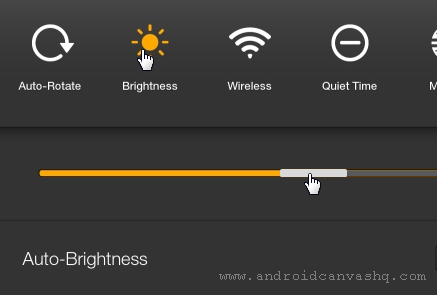
  2. Then look for 'Brightness' control at the top and tap on it.
  3. You can find a slider beneath which accounts for the screen brightness level. Sliding it makes the screen grow brighter or darker.
  4. Now slide down the slider button to the right to increase kindle fire's screen brightness and to decrease the brightness just slide it to the left.
  5. Alternatively tap on 'Settings' on quick settings pane and choose 'Display & Sounds' option.
  6. Go to 'Display Brightness' and look for a slider under it. This is another way by which you can change brightness level on kindle fire. Simply move the slider knob up or down to make display screen brighter or dimmer.
Related Read:

Using the above methods, you can easily increase or decrease screen brightness on Amazon kindle fire tablet.

How to Turn ON/OFF Auto Brightness on Kindle Fire

Posted by on 8/08/2016

This article will show you how to turn on or off auto brightness on kindle fire tablet. Display is the highest power consuming factor on your kindle device but it has been designed in such a way to save up the battery juice when and where possible.

Fire has a feature called auto-brightness which on enabled will turn up the screen brightness when under direct sun-light but grew dimmer in darker ambience. Undoubtedly an energy saver, but some may find it annoying. You can turn off this auto brightness setting to keep fire from increasing/decreasing brightness level automatically.

Here are the easy steps to turn on/off auto brightness on kindle fire.

How to Turn ON/OFF Auto Brightness on Kindle Fire?

how-to-turn-on-off-auto-brightness-on-kindle-fire
  1. On your Kindle Fire Screen, drag your finger from top to pull down the quick settings pane.
  2. Then tap on 'Settings' gear icon and choose 'Display & Sounds' option.
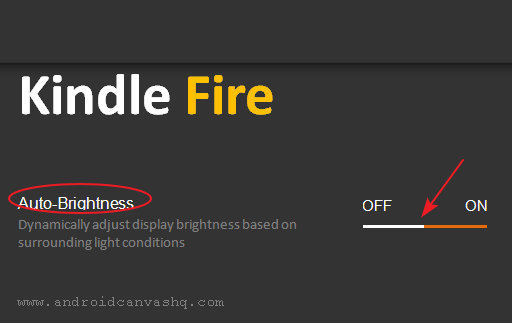
  3. Now look for 'Auto-Brightness' setting and check the toggle switch next to it. Unless you have disabled auto brightness already, it remains 'ON'. Tap on the toggle switch once to turn it 'OFF'. You can tap again to turn auto-brightness 'ON' in kindle fire.
  4. The change takes effect immediately and you are rid from the annoying automatic change in brightness level on Amazon Kindle Fire.
  5. But keep in mind since you have turned off auto brightness, from now on it's up to you to turn up or down the kindle fire screen brightness manually.

By following the above simple steps you can easily turn on or off auto brightness on kindle fire tablet.

How to Change Name on Amazon Kindle Fire Tablet/Phone

Posted by on 8/05/2016

This tutorial will show you how to change name on amazon kindle fire tablet or phone. Amazon.com assigns names automatically to all of your devices such as Amazon Kindle, Kindle Fire, and Fire phone and kindle apps added to your account.

These names are based on your account username and can easily become confusing if you have several apps and devices under your account. But luckily you can rename the devices to look something more appropriate. Either you can change the name from your devices itself or through your amazon.com account.

Change the Name of Your Kindle Fire Tablet/Phone:

change-name-on-amazon-kindle-fire

Here we'll see how to rename your kindle fire from the device itself.

  1. To get started, swipe down your finger from top of the Fire tablet screen to access quick settings.
  2. Then tap on 'Settings' icon and scroll down to 'Device Options' and tap again.
  3. On the next page look for 'Change Your Fire's Name' setting and tap on it. The name appears below that is the name of your fire tablet.
  4. Give your kindle fire a more sensible name and tap on 'Save'. The new name will take effect immediately and will appear both on top left corner of the 'Status bar' and under 'Device Options' page.
  5. Since all your kindle devices/apps will be synched to your Amazon.com account, the name you have changed will be saved to Amazon server. You can login to your Amazon account and verify the devices name easily.

You can follow the very same steps to change name on Fire Phone too.

Related Read: How to Find the Email Address of Your Kindle Fire Tablet

That was all about changing name on kindle fire tablet and phone.

How to Check Storage Space Left on Kindle Fire

Posted by on 8/03/2016

This tutorial will show you how to check storage space left on kindle fire tablet. If you are using your Kindle Fire for just reading eBooks then you don't have to worry about storage. Otherwise storage matters - a lot. With videos, music, pictures and loads of apps you will easily run out of memory in Kindle Fire.

Plus the device might also suffer from performance issues if it gets to the last bits of storage. So keeping an eye on the device's memory will help you maintain the available storage to the best. Follow these simple steps to check the storage space left on Kindle Fire anytime.

How to Check Storage Space Left on Kindle Fire?

check-storage-space-left-on-kindle-fire
  1. To check how much storage space is still available on your Kindle Fire, drag down your finger from top of the screen to reveal quick settings pane.
  2. Next tap on the 'Settings' and in the list that follows move on to the 'Device Options' and tap on it.
  3. Under device options, tap on 'Storage' to open storage settings.
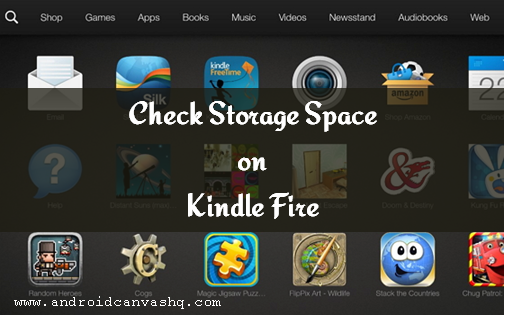
  4. Now look for 'On-Device Storage' which refers to the inbuilt flash memory of your kindle device. Under it Fire calculates and displays the amount of occupied storage on the left side and the free space available on the right hand side.
  5. Besides Fire will also show you how the storage has been allocated among various tasks in visual interpretation. If you ever run out of space, you can simply move files from the device to Amazon cloud directly and free up memory anytime.

Likewise you can easily check storage space left on Amazon kindle fire tablet.

How to Show Battery Percentage Left on Kindle Fire

Posted by on 8/01/2016

Are you worried about draining kindle fire's battery power completely by mistake? Well! You can now show the battery percentage left on top notification bar and get an accurate estimate of how much backup is left on kindle fire.

Kindle fire keeps track of battery life left on your device and you can make this information to show on top notification bar next to battery icon. By this way you can always keep an eye on your fire tablet's backup and put it on charge when required.

How to Show Battery Percentage Left on Kindle Fire?

show-battery-percentage-left-on-kindle-fire-tablet
  1. Pull down the notification bar to open quick settings panel.
  2. Tap on 'Settings' to the right to show settings menu.
  3. Scroll down and tap on 'Device Options'. Under device options you can check kindle fire's remaining battery life in percentage.
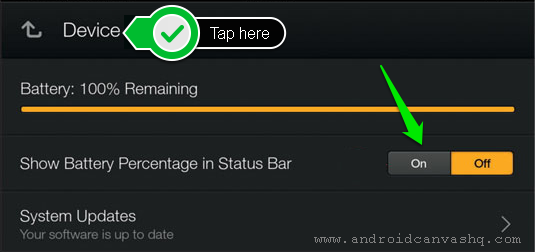
  4. Now to display this battery percentage left on Amazon kindle fire's notification bar, tap on the toggle button next to 'Show Battery Percentage in Status Bar' to turn it ON.
  5. The change will take effect immediately and the percentage of remaining battery life appears to the left of the battery icon on top. From now on, you can keep an eye on kindle fire's battery backup and charge the device in advance without running out of juice.

Related Read: How to Turn ON/OFF Keyboard Sound on Amazon Kindle Fire

Following these simple steps you can easily show battery percentage left on kindle fire tablet and make it to stay on top status bar.

How to Turn ON/OFF Keyboard Sound on Amazon Kindle Fire

Posted by on 7/29/2016

This article will show you how to turn on / off keyboard sound on kindle fire tablet. Amazon kindle fire's on-screen keyboard sound is muted by default and it may look weird for some. Turning ON the keyboard sound in kindle fire not only feels 'normal' but has little advantage to it.

Basically, Kindle Fire comes with a keyboard that sounds different for alphabets & numbers than from special keys. While typing, you will be alerted by the varied sound when you hit wrong key, so you can correct yourself immediately. If you don't know how to turn on keyboard sound in fire tablet then follow the below procedure.

Turn ON/OFF Keyboard Sound on Amazon Kindle Fire:

turn-on-off-keyboard-sound-on-amazon-kindle-fire
  1. On the Home screen navigate to the top-right corner and tap on 'Settings' gear icon.
  2. Scroll down to the bottom of the screen and tap on 'Keyboard' option.
  3. Now look for 'Keyboard Sounds' item on the list with ON/OFF toggle switch. Tap on the toggle button to turn on the keyboard sound in kindle fire. Tap again to turn off the keyboard sound.
  4. Change the toggle switch to ON/OFF mode to enable/disable keyboard sound as per your choice and the settings takes effect immediately.

Read Also: How to Find Email Address for Amazon Kindle Fire Tablet

Likewise you can easily turn on/off keyboard sound in Amazon kindle fire tablet.

What is My Email Address for My Kindle Fire Tablet

Posted by on 7/27/2016

What is my email address for my kindle fire? If this question nags you then probably you're wondering which email address you should use to send documents to Amazon kindle fire. Generally all your Amazon kindle device/apps will be attached with an email address at the time of registration.

These are called as 'Send-to-Kindle e-mail address' which is a unique auto-generated email-id assigned to your registered kindle fire/kindle apps. They can be used to send eBooks, pdf or other documents to the device as email attachment. If you don't know what's your kindle fire tablet email address is, then find it using the below suggested method.

What is My Email Address for My Kindle Fire?

what-is-my-email-address-for-my-kindle-fire
  1. To get started login to your amazon account and click on 'Your Account'.
  2. On Your account page, select 'Manage your content and devices' link under 'Digital Content' section. This will open up a page with 'Your Content' and 'Your Devices' tabs.
  3. Move on to 'Your Devices' tab and choose the device to load the information related to that specific device at the bottom. Now look for the email address that ends with @kindle.com. Generally these are based on the username you provided at the time of registration or purchase.
  4. All your kindle email addresses would be auto generated one. So if you want to rename it, click on the tiny 'Edit' link next to the email-address and modify it and hit 'Save'. From now on you can use this email address to send documents to your kindle fire tablet.

Using this method you can easily find the email address of your amazon kindle fire tablet.