Are the desktop icons in your Windows 10 pc/laptop looks zoomed or stretched and you want to fix Windows 10 screen resolution problem? Then here's how to change screen resolution in Windows 10. Generally screen resolution is responsible for display clarity and it depends upon the monitor or display screen size of the device.
Installing Windows OS and Graphics drivers automatically set the screen resolution to the recommended dimension. But high graphics softwares or games may reset screen resolution or force you to choose something different.
If you are a new Windows 10 user, then finding the screen resolution settings is bit difficult. As Microsoft has moved most of the settings to its new Settings App and renamed the option from 'Screen Resolution' to 'Display Settings'. Just follow the below given method to change Windows 10 screen resolution via 'Display Settings'.
Change Screen Resolution in Windows 10:
- Before adjusting the screen resolution close-off or at-the-least minimize all other opened windows. Just use keyboard shortcut
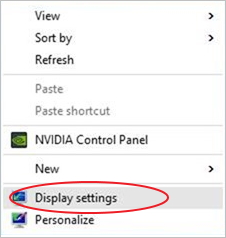
Win logo + Dto minimize all windows. - Now right-click mouse anywhere on Desktop and choose 'Display settings' from the context-menu.
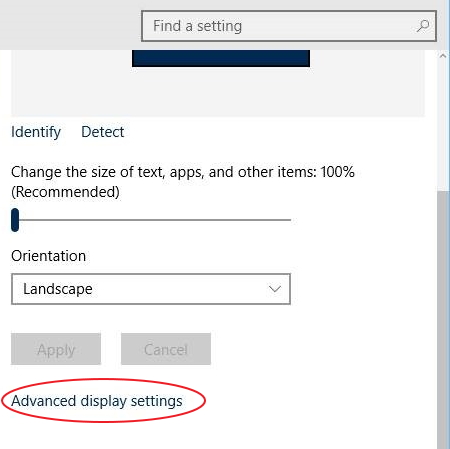
- This will open 'Display' settings on 'Settings' app. Now move on to the right side pane and click on 'Advanced display settings' link.
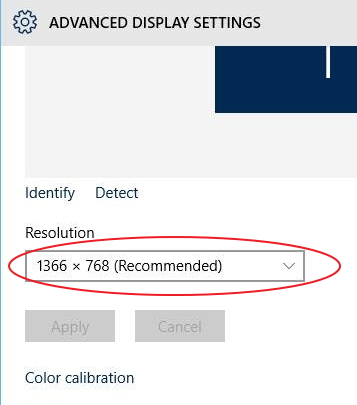
- Locate the dropdown box under 'Resolution' and click on it to view all the supported screen resolutions for your machine. Choose any one of them and click 'Apply'. Unless you have to, never choose anything other than the recommended size.
- Next you will be greeted with a popup showing for fifteen-seconds letting you confirm the new screen resolution or revert back to the old one. If the new setting fits you okay then click on 'Keep changes' button else click on 'Revert' to roll back the changes you made.

On the other hand if your PC includes GPU like NVIDIA or Integrated Intel Graphics, you can change the screen resolution on their settings panel.
To Change Windows 10 Display Resolution for Nvidia,
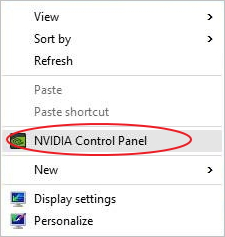
- Right-click Mouse anywhere on Desktop and select 'NVIDIA Control Panel' from the context menu.
- Once inside NVIDIA Control Panel, choose 'Change resolution' under 'Display' settings on the left-pane. It will show all of the supported resolutions on the right-pane. Choose the one you want and 'Apply'.
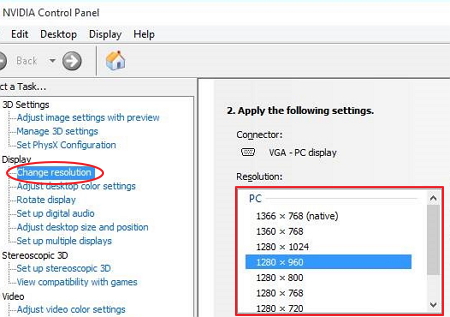
That will do the trick.
To Change Windows 10 Screen Resolution via Intel Graphics,
- Right-click on desktop screen and select 'Graphics Properties'.
- It will launch the Control Panel for Intel HD Graphics. Now select 'Display', choose your desired resolution from the drop-down and hit 'Apply'.
That should change the screen resolution of Windows 10 PC/Laptop.
Also Read: How to Get Help with File Explorer in Windows 10
Recommended: How to Defer Upgrades in Windows 10
I hope this guide explains clearly how to change screen resolution in Windows 10. Just remember to keep the display resolution to the recommended dimension as this one will be the best size fitting your monitor screen properly.

No comments